SSH is a popular protocol used to manage systems remotely, transfer files, etc. SSH provides access to the remote systems in a secure way by encrypting the communication which is transferred over the computer networks. SSH also protects security by making authentication to access remote systems. Authentication can be done in different ways. The most popular way for authentication is using a password which is generally typed during the login. SSH also provides a more secure way for authentication like Public and Private Keys. By using keys there is no need to type a password. The user’s public and private keys will be used to automatically login to the remote system.
Public and Private Key
Before creating the Public and Private keys we should describe what is public and private keys. The public and private keys are generally used to authenticate or sign some data or documents. The public key is available for everyone in order to validate the private key signed data. The private key is only used by the owner of the public and private key user. Only the private key user can sign a data or document and all others having the public key can validate this data or document.
- Public Key is copied to the remote servers to be used by the SSH service. For authentication, some random data is encrypted with the public key where this encrypted data can be only decrypted with the private key. The encrypted data send to the client and if the client can return the same clear text or decrypted data the authentication is completed succesfully.
- Private Key only owned by the user. For the SSH authentication, the remote SSH server sends some public-key encrypted data and this data is decrypted with the private key only.
Generate/Create Public and Private Key with ssh-keygen Command
The ssh package in Linux provides the ssh command and related tools like ssh-keygen. The ssh-keygen is used to generate or create SSH keys. It can be also used to manage and convert keys too. By default, the ssh-keygen command generates RSA public and private keys. The generated public and private keys are stored under the current user home directory ~/.ssh/ folder. The public key is named id_rsa.pub for the public key and id_rsa for the private key. The rsa is added to the name as the key algorithm is RSA.
$ ssh-keygenThe output will be like below but during the creation of the public and private keys, some questions will be asked.
- Enter file in which to save the key (/home/ismail/.ssh/id_rsa) is asked for the path the keys will be created and stored. By default the current user home directory ~/.ssh/ path with the id_rsa private key name is provided. You can skip this by just pressing enter.
- /home/ismail/.ssh/id_rsa already exists. is printed if there is already existing public and private key with the same name. If you are creating a public key for the first time you will not see this message.
- Overwrite (y/n)? y is asked if we want to overwrite the existing public and private key. Type y and press Enter to overwrite.
- Enter passphrase (empty for no passphrase): and Enter same passphrase again: asked as a password to protect created public and private keys. If you do not provide any password or passphrase they will not encrypt which is a more practical way. So we will not provide any password and just press Enter.
- Your identification has been saved in /home/ismail/.ssh/id_rsa is the newly generated private key with its path and name.
- Your public key has been saved in /home/ismail/.ssh/id_rsa.pub is the newly generated public key with its path and name.
- The key fingerprint is: SHA256:vH8btGCLor2vZy77LJD03T1pjWv12o28oSCmY5GAakU ismail@ubuntu is the key ID which is used to identify key with a unique number which is named as fingerprint.
Generating public/private rsa key pair.
Enter file in which to save the key (/home/ismail/.ssh/id_rsa):
/home/ismail/.ssh/id_rsa already exists.
Overwrite (y/n)? y
Enter passphrase (empty for no passphrase):
Enter same passphrase again:
Your identification has been saved in /home/ismail/.ssh/id_rsa
Your public key has been saved in /home/ismail/.ssh/id_rsa.pub
The key fingerprint is:
SHA256:vH8btGCLor2vZy77LJD03T1pjWv12o28oSCmY5GAakU ismail@ubuntu
The key's randomart image is:
+---[RSA 3072]----+
|                 |
|   E             |
|  ..             |
|  ..o  .         |
| ... + oS.o..+   |
|..  o + .+.+*.o  |
|.    ...= o.o+.. |
|     o==oo .++ +o|
|    ..*&= .oo.=oo|
+----[SHA256]-----+
Alternatively, we can create the public and private keys by overwriting with the -o option for the ssh-keygen. Actually, if the key already exists it will be asked during creation but using the -o option it will be automatically overwritten.
$ ssh-keygen -oList Public and Private Key
As stated previously the created or generated public and private keys are stored in the user’s home directory ~/.ssh/ folder by default. So we can list current public and private keys by listing this directory content with the ls command.
$ ls -l ~/.ssh/
The output is like below where id_rsa and id_rsa.pub is listed.
total 16
-rw------- 1 ismail ismail 567 Oct 19 00:45 authorized_keys
-rw------- 1 ismail ismail 2602 Nov 12 21:59 id_rsa
-rw-r--r-- 1 ismail ismail 567 Nov 12 21:59 id_rsa.pub
-rw-r--r-- 1 ismail ismail 222 Oct 19 00:45 known_hosts
There are also some extra files like below.
- authorized_keys file is used to store remote user public keys which are already authorized with the current user account. This means the authorized key users can log in to this system with the current user via SSH without a password with just their public keys.
- known_hosts is a file that stores the remote SSH servers IP addresses, usernames, and fingerprints. The known_hosts file is used for security wherein every SSH connection initialization the fingerprints of the remote SSH server is check for change and if it is different the SSH connection is dropped and a security message is provided to the user.
Configure Remote SSH Server For Keybased Authentication
After creating the public and private key pairs these keys can be used in order to authenticate users without a password for the remote SSH servers. The ssh tool suite also provides the ssh-cop-id command which is installed with ssh by default. As its name suggest the ssh-copy-id command simply puts the current user public keys to the remote SSH server authorized_keys file for public key-based authentication. Using the ssh-cop-id command is the same as the ssh command where we will provide the username and the remote system hostname or IP address like below.
$ ssh-copy-id [email protected]
The output is like below after we have provided the password for the remote user named ismail .
/usr/bin/ssh-copy-id: INFO: attempting to log in with the new key(s), to filter out any that are already installed
/usr/bin/ssh-copy-id: INFO: 1 key(s) remain to be installed -- if you are prompted now it is to install the new keys
[email protected]'s password:

Number of key(s) added: 1

Now try logging into the machine, with:   "ssh '[email protected]'"
and check to make sure that only the key(s) you wanted were added.
- [email protected]’s password: line request the user ismail password.
- Number of key(s) added: 1 line informs that the public key is added successfully.
Now we can try to login to the remote SSH server without a password by using a currently deployed public key like a regular ssh connection with the following command.
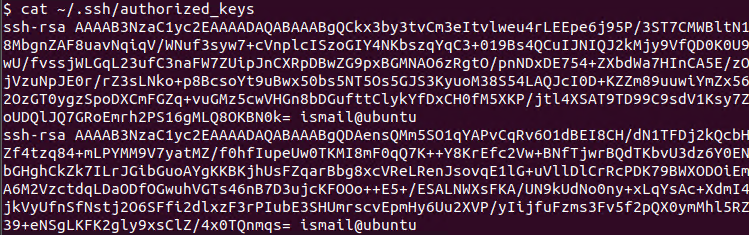
$ ssh [email protected]We can also check the authorized_keys file for the latest public key addition. The authorized_keys file is a simple text file that contains the public key in base32 format and the username. We will use the cat command which will print the authorized_keys content.
$ cat ~/.ssh/authorized_keys