MySQL is the most popular open-source database management server. MySQL is available for different operating systems like Linux, Solaris, macOS, and Windows. Ubuntu is a popular Linux distribution used by end-users and enterprise servers. In this tutorial, we will learn how to install MySQL into Ubuntu 20.04. Also, this tutorial can be also used for other Ubuntu versions like Ubuntu 18.04, etc.
Install MySQL Database Server From Official Ubuntu Repositories
MySQL database server can be installed in different ways but installing from the official Ubuntu repositories is the most popular and reliable way. Ubuntu project provides the MySQL packages with community support and with a heavy testing stage.
Like every package installation, we will update the repository and package information in order to get the latest information about packages. The following package will ask for the current user password for the root privileges.
$ sudo apt updateNow we have updated the repository information and before installing the MySQL database server we will print the MySQL package information. MySQL server package is named as mysql-server and information about this package can be displayed like below.
$ apt show mysql-server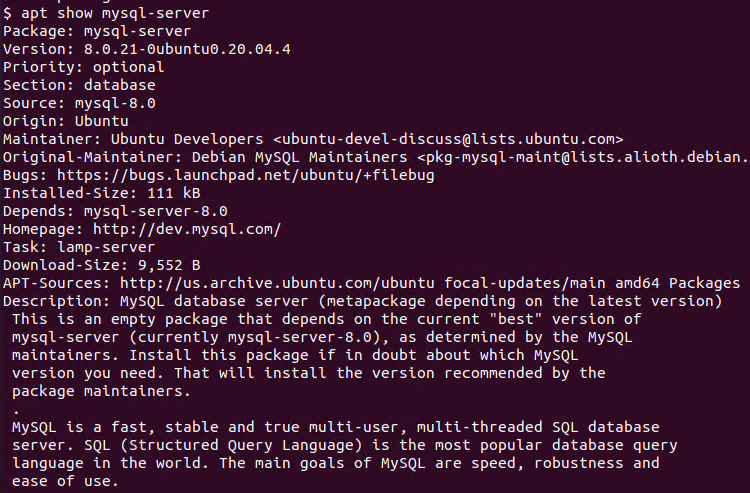
From the information, we can see that the provided mysql-server version is 8.0 and this package is mainly created for Ubuntu 20.04.
Now we can install the MySQL Database Server with the package name mysql-server like below. Package installation requires root privileges so we use the sudo command too.
$ sudo apt install mysql-serverAfter the Mysql Database server installation is complete we can check the mysql database service status with the systemctl command like below. We will look the MySQL service start, stop, restart and status in detail later.
$ sudo apt install mysql-server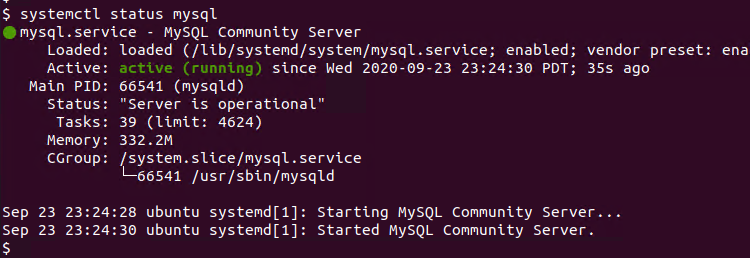
Install MySQL Database Server From Official MySQL Deb Packages
Start, Stop and Restart MySQL Service
After the installation of the MySQL database server, the service will start automatically. the default status of the MySQL database service is on where even the system reboots the service will start automatically. We can check the current status of the MySQL service as below.
$ systemctl status mysql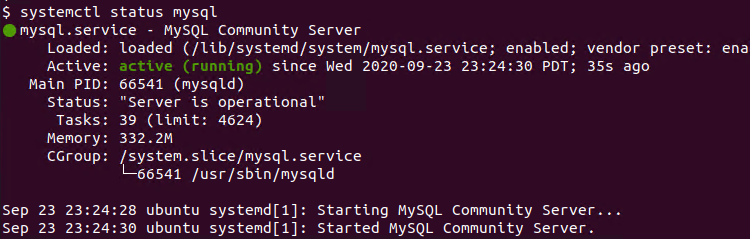
We can see the green text which means the service is active and currently running.
We can stop the MySQL service with the systemctl stop command. But after a system restart or reboot the MySQL service will start automatically by default.
$ sudo systemctl stop mysqlWe can start the MySQL service with the systemctl like below.
$ sudo systemctl start mysqlOr we can disable the MySQL service auto start at the system start or reboot like below.
$ sudo systemctl disable mysqlIf the MySQL service is disabled to start automatically at the system start or reboot we can enable the MySQL service automatically start like below.
$ sudo systemctl enable mysqlPrint MySQL Service/Server Version and Uptime
MySQL server or service version can be displayed by using the mysqladmin command. Also this will provide the uptime information.
$ sudo mysqladmin -p -u root version
From the output we can see that the MySQL version is 8.0 and the uptime is 56 minutes 22 seconds.
Alternatively the mysql command can be used with the -V option to print MySQL server version.
$ mysql -VSecuring and Hardening MySQL Server Installation
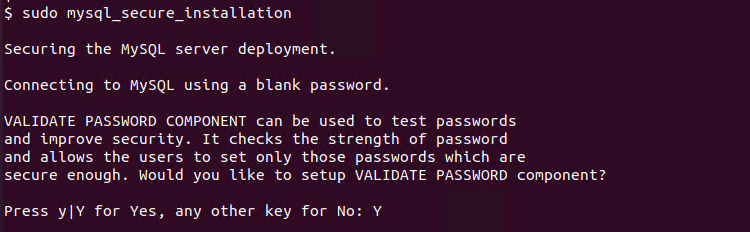
Database is one of the most important component of the IT systems. Most of the important or ciritical data are stored inside databases. As a popular database server MySQL server shoudlbe hardened or secured to prevent data breachs. MySQL installation provides the mysql_secure_installation script which will make some checks and configurations to make MySQL database server. This script should be run as root where you can use the sudo command.
$ sudo mysql_secure_installationAfter starting the hardening process first question will be validating the password and checking the strength of the password.
Second step issetting pasword security level which is mainly related with the password complexity. There are 3 different password security levels.
LOW level policy will requires at least 8 characters for password.
MEDIUM level policy requires at least 8 characters which should contain numeric, mixed case, and special characters.
HIGH level policy requires at least 8 characters which should contain numeri, mixed case, special characters and dictionary check.

Next step is setting the root user password according to the new password policy. By default root password is empty and should be set a new password.

By default MySQL server contains an anonymous user which can create security problems. In this step we will remove the anonymous user from the MySQL server.

MySQL root user can connect from localhost and network but providing network access for the root user is a security problem. Best practice is removing the root user access from network. You will continue access MySQL server with root user from local system.

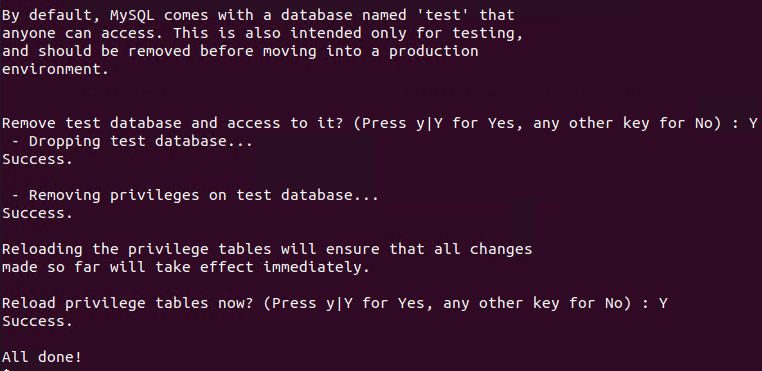
MySQL server comes with a test database which contains default tables and values. This is useful for test environment or make some basic tests but create security problems for production environments. So we will remove the test database and access privileges.
Connect and Access MySQL Command-line Interactive Shell
MySQL provides access to the database server via a command line or an interactive shell. This can be useful to test or change some configurations like change passwords, add a table, create a database, add a row or record, etc. The MySQL command-line shell can be accessed from the local system like below. Even the MySQL interactive shell can be accessed from remote systems after hardening root user can not access remotely.
$ mysql -u root -p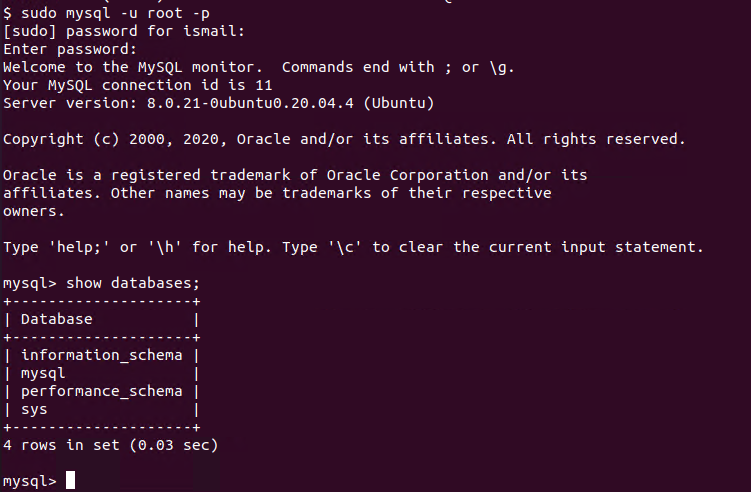
Create New MySQL User
MySQL server comes with the root user by default but we can add new users later and configure access to the different databases. The Create User SQL command can be used to create a user by specifying the password of the user. In the following example we will create the user named ahmet which can access the MySQL server from the localhost. This means ahmet can not access the MySQL server remotely over the network. The password for the ahmet is provided as M3S3cr3tPass.
CREATE USER 'ahmet'@'localhost' IDENTIFIED BY 'M3S3cr3tPass.';After creating the user generally access for specific databases are configured. Below we will configure access for ahmet to all databases.
GRANT ALL PRIVILEGES ON *.* TO 'ahmet'@'localhost' WITH GRANT OPTION;Alternatively we can configure access to the only specific databases like below. In the following command we will allow access of the user ahmet into database named linuxtect.
GRANT ALL PRIVILEGES ON linuxtect.* TO 'ahmet'@'localhost' WITH GRANT OPTION;As a last step to flush or make change available right nuw flush command can be used like below.
Flush;In onder to close the MySQL command line interactive shell the exit command can be used like below.
exit;
Uninstall MySQL Server
MySQL server can be removed or uninstalled easily by using the apt or apt-get commands like below. In order to uninstall the MySQL server, the root privileges will be required and sudo command can be used to provide root privileges.
$ sudo apt remove mysql-serverOr with the apt-get command.
$ sudo apt-get remove mysql-server