Linux provides a lot of tools and commands to monitor performance and resource usage. But dstat is one of the most popular commands used by users and system administrators. The dstat command is a replacement for the vmstat, iostat, and ifstat command. It merges all these commands into a single command and a single screen in a readable and easy to follow way. By using the dstat the disk usage network usage or CPU usage can be monitored in a single interface second by the second manner. Also, dstat provides a colored output which makes it more readable for metric changes.
Install dstat
The dstat is not installed by default in most of the Linux distributions. But can be installed easily by using the apt and yum package managers.
Install dstat For Ubuntu, Mint, Debian, Kali:
sudo apt install dstatInstall dstat For CentOS, Fedora, RHEL:
sudo dnf install dstatRun dstat
The dstat can be run without any parameter or option. This lists general monitoring metrics like CPU, disk, network, memory etc.
dstat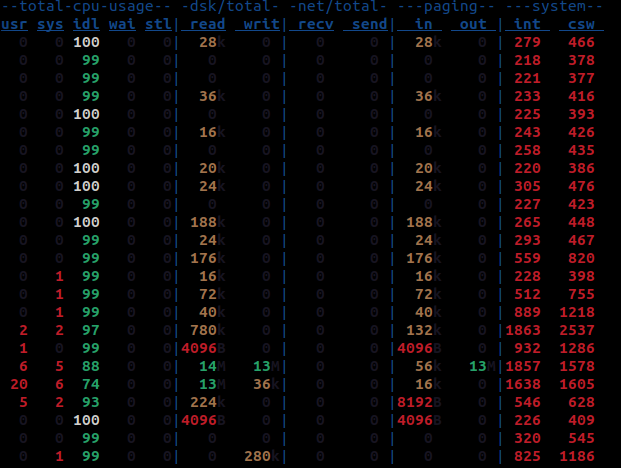
From the output we can see that some metric values are colored in different than others. For example if the CPU is completely idle or %100 free this metric is colored as white. Below we list the output metrics and their descriptions.
- total-cpu-usage column contains CPU related metric values.
- usr column displays the user level CPU usage.
- sys column displays the system-level CPU usage.
- idle column displays non used CPU
- wait column displays waiting for requests.
- hiq
- siq
- dsk/total columns display disk usage information
- read column displays the read size to the disk.
- write column displays the read size from the disk.
- net/total column contains network-related metric values.
- recv column displays received network traffic size.
- send column displays received network traffic size.
- system column contains interrupt related metric values.
- int column displays the number of interrupts.
- csw column displays the number of context switches.
dstat CPU/Processor Metrics and Monitoring
The vmstat is the predecessor of the dstat command which provides virtual memory-related metrics mostly related to memory and process. The –vmstat option can be provided into the dstat command to monitor these metrics.
dstat --vmstat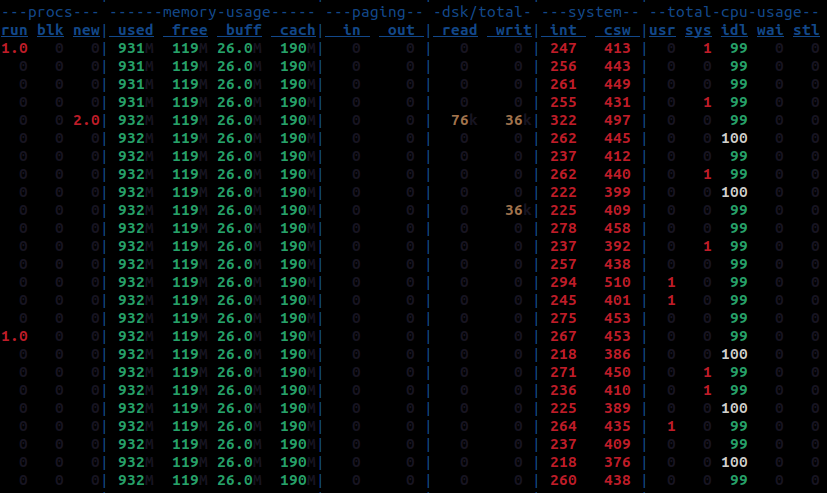
The –vmstat provides the following metric values.
- procs column displays the process for different states.
- memory usage column displays memory usage for different states.
- paging column displays the paging related values.
- dsk/total column displays disk related metric values.
- system column displays interrupt related metric values.
Monitor Top CPU/Processor Using Process
The dstat can be used to monitor the top CPU/Processor using process with extra information like CPU and memory. The –top-cpu option displays the opt CPU/processor using process and -c is used to display general CPU usage.
dstat --top-cpu -c -m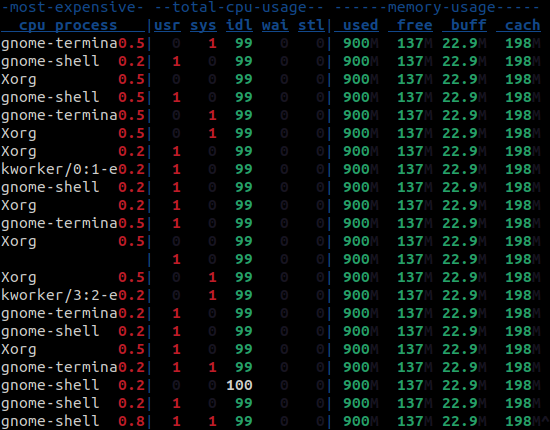
Monitor Top Memory Using Process
Also the most memory using process can be listed with the –top-mem option like below.
dstat --top-mem -c -m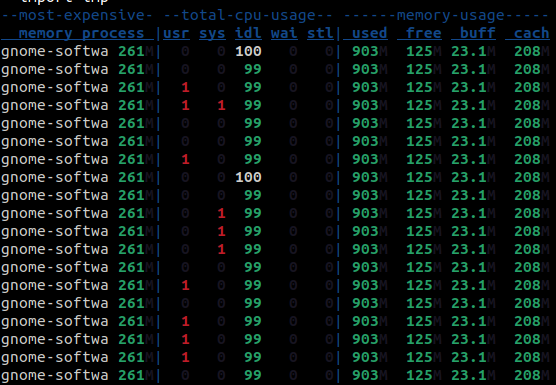
Exit From dstat
The dstat provides interactive screen which refresh every 1 second. It do not exist automatically by default. We can exit from the dstat by pressing CTRL+C keyboard shortcuts.
Save dstat Output Into A File
Another useful freature of the dstat command is the ability to save monitored metrics into a file for later review. The dstat output can be saved into a file with the –output option where the file name is also provided. The output of the dstat is formatted as CSV file where every column is delimited with comma.
dstat --output monitoring.csvdstat Plugins
The dstat supports alot of different plugins to print related monitoring metrics. These plugins are located under /usr/share/dstat directory. Currently installed plugins can be listed with the –list option like below.
dstat --list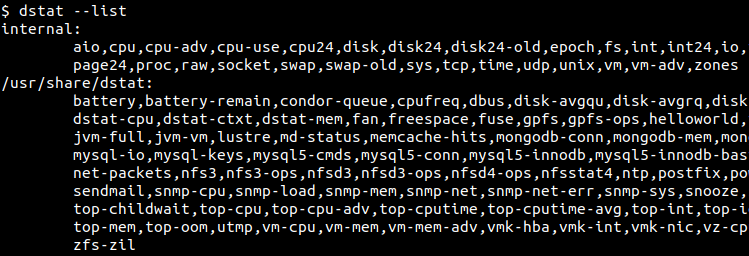
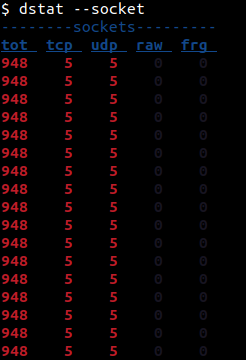
As we can see we can monitor CPU frequency with the cpufreq plugin. Plugins can be used as options like –cpufreq. Some plugins may require root privileges. In the following example, we will monitor the network sockets with the –socket option.
dstat --socket