
The tcpdump command or tool is used to analyze network packets on Linux systems. It provides the ability to parse, filter and display network packets and protocols in different ways. The tcpdump is created in 1988 for BSD systems and ported most of the Unix, Linux operating systems and became very popular. The tcpdump is an alternative tool for Wireshark where tcpdump can be used without a GUI or desktop environment via the command-line interface.
Install tcpdump
The tcpdump command may not be installed by default in some Linux distributions. But it is provided by most of the Linux distributions via package managers apt and dnf or yum . We can install the tcpdump on Ubuntu, Debian, Mint, Kali, CentOS, RHEL, Fedora, etc. like below.
Install tcpdump On Ubuntu, Debian, Mint, Kali:
$ sudo apt install tcpdumpInstall tcpdump On CentOS, RHEL, Fedora:
$ sudo dnf install tcpdumpRun tcpdump and Display All Traffic
The tcpdump command access the operating system level functions which require administrative root privileges. So the tcpdump command can not be run and executed as a regular user unless root privileges are provided. If we try to run tcpdump with regular user privileges we will get an error like “tcpdump: ens33: You don’t have permission to capture on that device (socket: Operation not permitted)“
$ tcpdump 
We should run the tcpdump with root privileges where the sudo command can be used. the current user should be access to the sudo command.
$ sudo tcpdumpAlternatively, we can the first login as root user and then run the tcpdump command without any extra sudo command.
$ su -
Now we assume we are login as root user and try to run tcpdump command now and during this tutorial.
$ tcpdump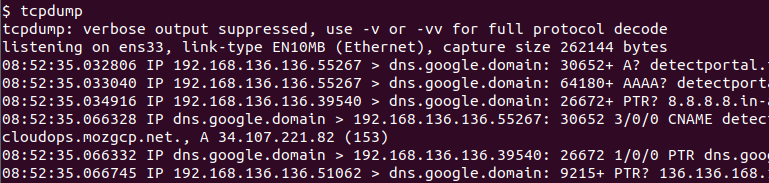
Filter Specific Network Interface Traffic
A system may have single or more network interfaces. Generally extra psedeu interfaces are created for virtual and auxiliary systems. By default, tcpdump command finds a network interface that has the default gateway and listens to this network interface. But we can also specify the network interface we want to listen to. First we can list the existing network interfaces with the option -D like below.
$ tcpdump -D1.ens33 [Up, Running] 2.lo [Up, Running, Loopback] 3.any (Pseudo-device that captures on all interfaces) [Up, Running] 4.docker0 [Up] 5.bluetooth-monitor (Bluetooth Linux Monitor) [none] 6.nflog (Linux netfilter log (NFLOG) interface) [none] 7.nfqueue (Linux netfilter queue (NFQUEUE) interface) [none] 8.dbus-system (D-Bus system bus) [none] 9.dbus-session (D-Bus session bus) [none] 10.bluetooth0 (Bluetooth adapter number 0) [none]
We can see that all interfaces are listed with an ID number and some basic information about their status. We can use these ID numbers or interface names in order to listen to the specific network interfaces. In the following example, we use the network interface name to listen to it with the tcpdump command.
$ tcpdump -i ens33Alternatively, we can specify the network interface ID number which is displayed while listing network interfaces.
$ tcpdump -i 1Filter Packets By Specific Host Traffic
Typical network traffic occurs between two hosts generally called client and server. The tcpdump can be used to filter network traffic filtering by the host which can be the client or server part. The host option is used to filter network traffic according to the host. the host generally identified with its IP address.
$ tcpdump host 192.168.1.10Filter Packets By Specific Source Host
The network traffic can be filtered according to the source host IP address. The network packets which are created by the source host is filtered with the src option and IP address of the source host.
$ tcpdump src 192.168.1.10Filter Packets By Specific DestinationTraffic
The network traffic can be filtered according to the destination host IP address. The network packets which are destinated to the destination host is filtered with the dst option and IP address of the destination host.
$ tcpdump dst 192.168.1.1Filter Packets By Specific Source Port
The tcpdump command can be used to filter packets according to their source and destination port numbers. The port option is used to filter packets for their destination and source ports in TCP protocol.
$ tcpdump port 443Filter Packets By Specific Destination Port
The network traffic command can be filtered according to the TCP protocol destination port. The dst port option is used to specify the destination port we want to filter.
$ tcpdump dst port 443Filter Packets By Specific Source Port
Even it is not so popular as a destination port we can filter network TCP traffic according to the source port number. The src port option is used to filter network traffic according to the source port number.
$ tcpdump src port 21Filter Packets By Port Range
Network traffic can be also filtered according to the port range where a range of ports can be specified to filter. The portrange option is used to filter packets according to the specified port range where the start and end port numbers are provided by separating them with dash - .
$ tcpdump portrange 20-30Filter Packets By Specific Network
Another useful option is filtering the network traffic according to the network IP address. All traffic sourced or destined with the specified network range is displayed and other networks related traffic is filtered. The net option is used to specify the network IP address range.
$ tcpdump net 192.168.1.0/24Display Packet Contents As Hex (Hexadecimal) Output
The tcpdump only displays basic information about the IP packets like source-destination IP address, port number, etc. But we can also display the packet contents in hexadecimal or hex format. The -X is used to display the content output as hexadecimal.
$ tcpdump -X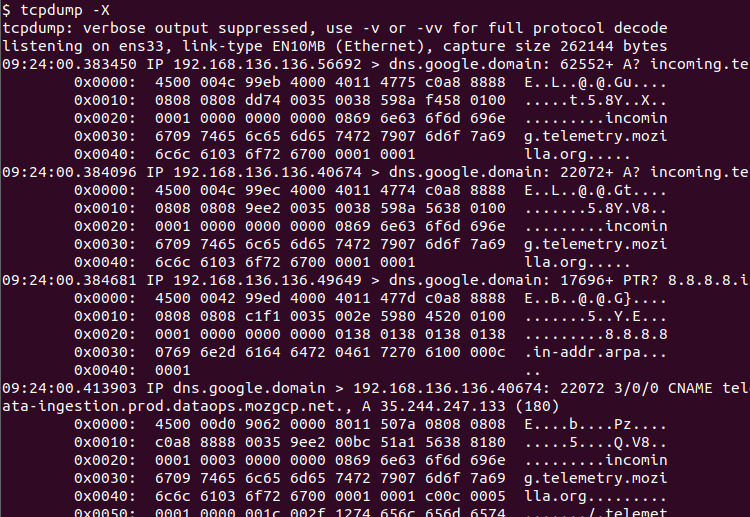
Filter Packets By Protocol
The tcpdump supports a wide range of network protocols like TCP, UDP, HTTP, FTP, IP, ICMP, ETHERNET, etc. We can use the tcpdump in order to filter network traffic according to the protocol. Only specified protocol packets are displayed. Just provide the protocol name to the tcpdump protocol as a parameter.
$ tcpdump icmpShow Only IPv4 Traffic
IP protocol has two versions named IPv4 and IPv6. The IPv4 is the most popular protocol and defacto protocol for the internet. We can filter the network traffic for the IPv4 protocol like below.
$ tcpdump ipshow Only IPv6 Traffic
Even it is not so popular IPv6 protocol is getting more popular. The IPv6 traffic can be filtered and displayed with the tcpdump like below.
$ tcpdump ip6Show Only TCP Traffic
The TCP protocol is the most popular transmission protocol used by a lot of different applications layer protocols. We can filter the TCP protocol like below.
$ tcpdump tcpShow Only UDP Traffic
Another protocol-based filtering is UDP protocol filtering which can be accomplished like below.
$ tcpdump udpFilter Packets By Packet Size
Every network packet takes some bandwidth which is also called packet size. We can use the tcpdump command to filter packets according to their sizes.
- The
lessoption is used to filter packets with less sizes then the specified size value. Alternatively the<sign can be also used. - The
greateroption is used to filter packets with greater sizes then the specified size value. Alternatively the>sign can be also used.
$ tcpdump less 512Read PCAP File
The tcpdump is generally used to sniff and analyze live network traffic from the network interfaces. But it can also read a PCAP file that contains network traffic as a capture or dump file. The -r option is used to read a capture or pcap file with its file name.
$ tcpdump -r mycapture.pcapWrite/Dump To PCAP File
The tcpdump command can be dump or store or save the captured network traffic into a file. This file is generally called a PCAP file. The -w option is used with the dump file name.
$ tcpdump -w mycapture.pcap